
Are you looking to get the most out of your Cerwin Vega subwoofer? If so, this guide is for you. In this article, we will go over how to connect your Cerwin Vega subwoofer and make sure you’re getting the best sound possible. With a few simple tips, you’ll be enjoying deep bass tones in no time! Continue reading for more information.
Contents
How To Connect Cerwin Vega Subwoofer

If you’re looking to get the most out of your Cerwin Vega subwoofer, there are a few things you need to do to ensure you’re getting the best sound quality possible. In this article, we’ll go over how to connect your Cerwin Vega subwoofer and make sure it’s properly set up for optimal sound.
1. What you will need
2. Connecting the subwoofer
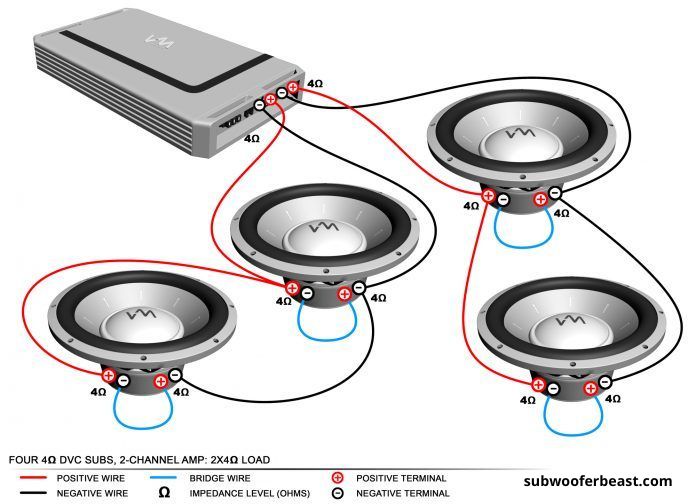
Start by connecting the positive and negative terminals of the Best subwoofer to the corresponding terminals on the amplifier. Next, run speaker wire from the amplifier to the subwoofer. Once the wire is in place, connect the RCA cables from the subwoofer to the amplifier.
3. Setting the crossover
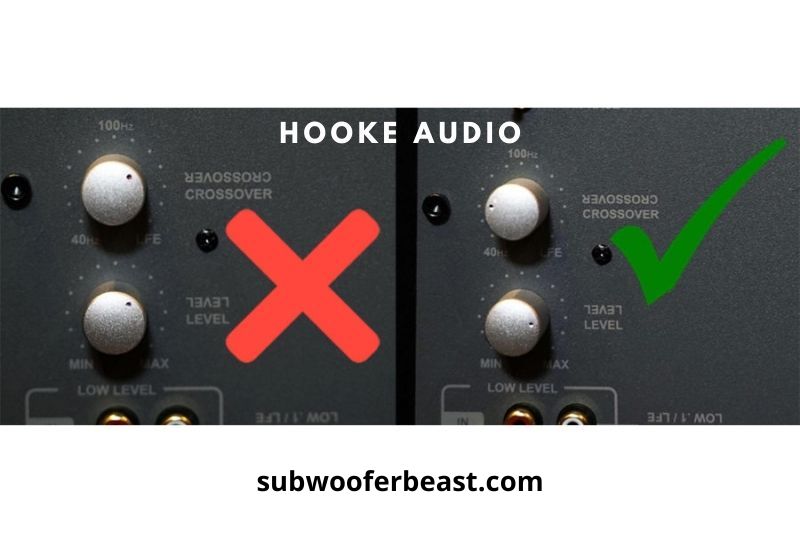
The crossover is responsible for determining which frequencies are sent to the Best Powered Subwoofer for DJs. In most cases, you’ll want to set the crossover to 80Hz. This will ensure that all of the low-end frequencies are sent to the subwoofer, giving you the best possible sound.
4. Adjusting the volume

Once everything is connected, you’ll need to adjust the volume of the subwoofer to get the best sound quality. Start by turning the volume all the way down, then slowly turn it up until you reach the desired level.
Following these simple steps will help you get the most out of your Cerwin Vega subwoofer and ensure you’re getting the best sound quality possible. With a few minutes of setup, you’ll be enjoying deep bass tones in no time!